What is Stock Management Software?
Stock management software is a type of software that helps businesses effectively monitor, manage and optimize their inventory. Such software is used for purposes such as monitoring operations such as purchasing, selling and storing product stocks, optimizing inventory levels, forecasting demand, managing orders, reducing inventory costs and meeting customer demands.
Order and Efficiency at the Heart of Your Business: Odoo Stock Management
In today’s competitive business world, the success of businesses depends on efficient inventory management. Effectively managing your inventory is one of the key factors in both reducing costs and increasing customer satisfaction. At this point, Odoo Stock Management comes into play. Helping you manage your business’s stock processes more intelligently and efficiently, Odoo Stock Module provides order and efficiency at the heart of your business.
Real-Time Stock Tracking and Access to Up-to-Date Information
Odoo Stock provides real-time stock tracking, allowing your business to know the stock status at any time. In this way, you can quickly react to demand and supply fluctuations and minimize stock shortages. At the same time, access to up-to-date data improves decision-making processes.
Automatic Stock Replenishment and Supply Chain Integration
Ensuring that orders are automatically replenished when stock levels are low is important for optimizing your business processes. Odoo Stock facilitates this process by working integrated with supply chain management. You can automatically create supplier orders and improve communication with the supplier.
Business Intelligence and Reporting Opportunities
Data is a goldmine for businesses. Thanks to Odoo Stock’s business intelligence and reporting features, you can access critical information such as stock movements, sales trends and stock costs. This data helps you make strategic decisions and improve your business processes.
Stock Transactions
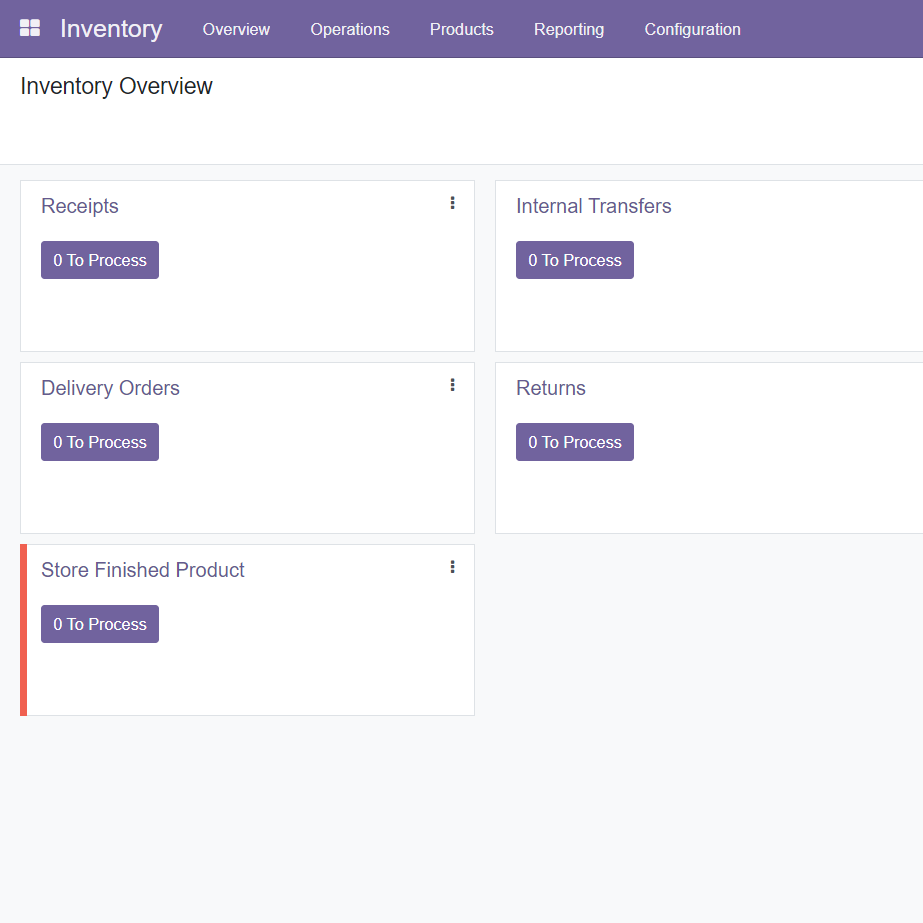
The Odoo platform with the Custom Stock module can make your company’s Inventory operations child’s play. With the effective management of the Odoo Inventory module, you can perform various inventory operations efficiently. This will make your company more efficient and productive. The inventory overview window will show all the operations of the company.
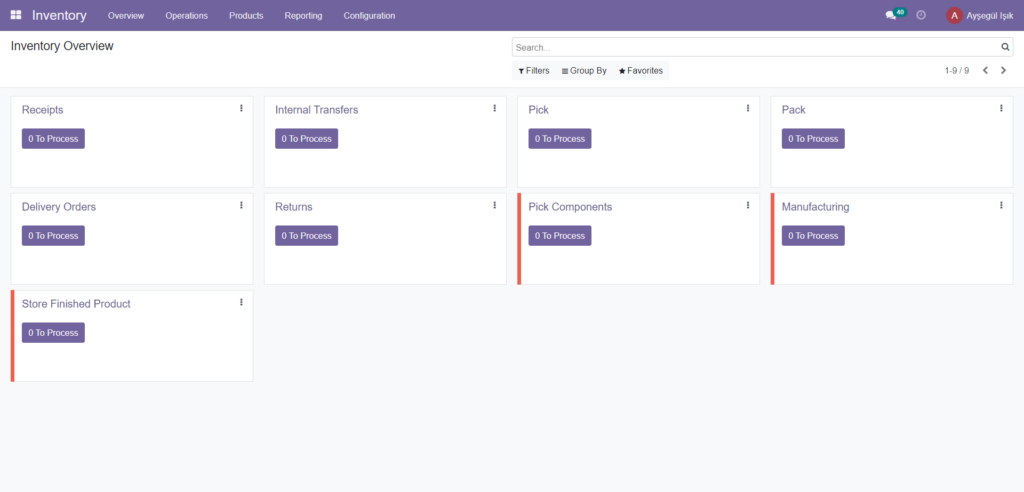
In the overview window here, you can view each of the processes displayed in the kanban view. Where you can view each such as Receipts, Internal Transfers, Delivery Orders, Returns, Production, Subcontractor of Supply and PoS Orders.
Transfers
Product Transfer is one of the main features available in the Odoo Inventory module, a type of internal operation that will handle internal transfer issues, which is the company’s function of moving products within company warehouses.v The window describing all Transfer details can be accessed from the Operations tab of the Odoo Inventory module.

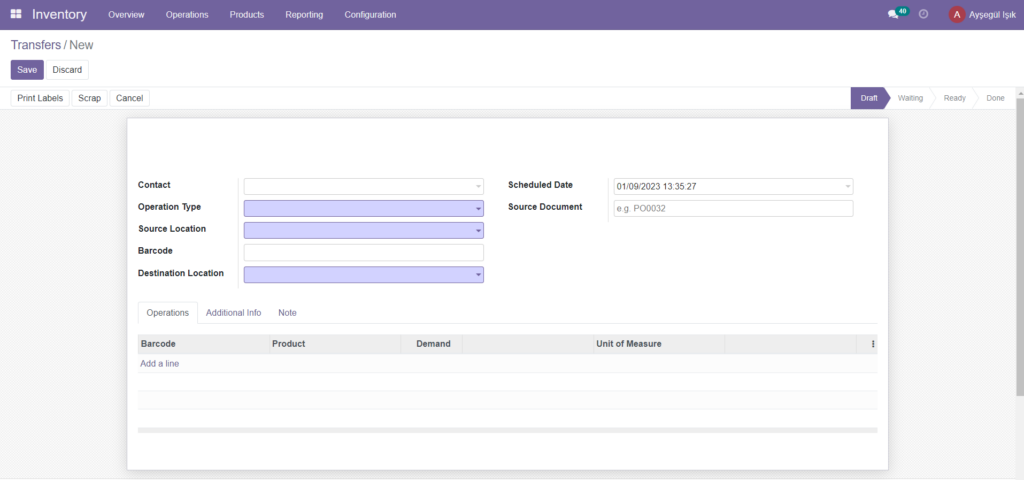
In this Transfers creation window, you can provide the Transaction Type, Scheduled Date, and Source Document as well as the Contact details. Under the Transactions tab, you can provide the details of the Product transferred, and in the Additional Information tab, you must fill in the shipping information such as Carrier for Shipping, Tracking Reference, Weight, Weight and Other Information such as Shipping Policy. Similarly, under the Note tab, you can add an internal note to be printed on the collections page.
Creating a Delivery Order
We can return to the Inventory overview window, where you can view the Delivery Orders menu. If you click on the side menu indicated by three dots, you will be able to see both instant transfer and scheduled transfer creation options as highlighted in the screenshot below.
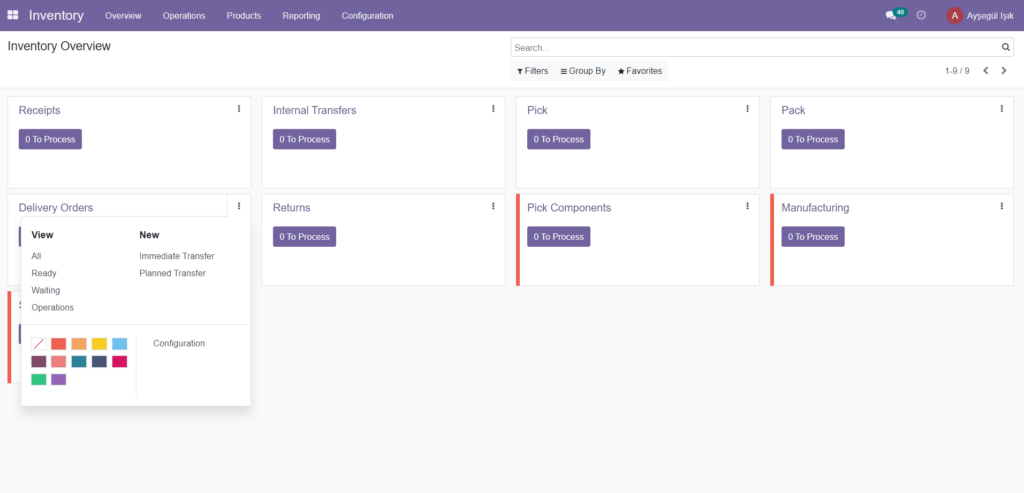
These two options are the two transfer types available in the Odoo system. Let’s take a look at each.
Instant Transfer
Instant transfer is one of the important elements in Odoo Inventory, transfers that we create manually when we need an urgent transfer. In other words, you can directly convert the products we process and their quantities in these transfers. You can click the Emergency Transfer icon from the Overview window of the Odoo Inventory module to make instant transfers.
When you select the Emergency Transfer icon, you will enter a new transfer creation window where you can create new instant transfers. You can also provide the Delivery Address along with the Source Document in the Creation form. Transaction Type, Resource Location and Scheduled Date will be allocated automatically. In addition, the product and the details of the product can be explained by selecting the Add line option in the Detailed Process tab. Once you have provided all the necessary details, you can verify it by clicking the available Verify button.
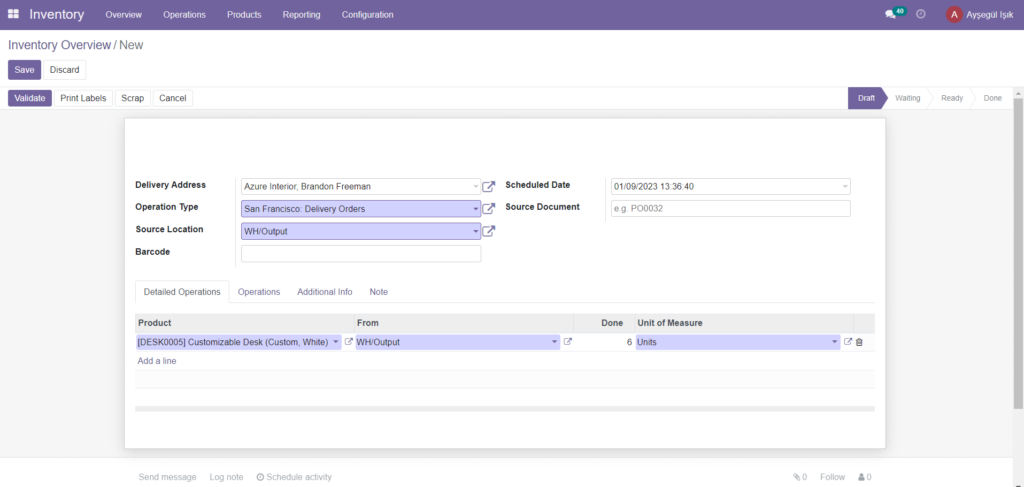
This is the instant transfer option available on the platform and now let’s take a look at the Scheduled transfer option available.
Planned Transfer
The Odoo Inventory module also allows you to make scheduled transfers. In such transfers, the transfers will be scheduled. New transfer requests will be created earlier and the reservation will be made upon these initial requests. This can be done by selecting the Scheduled Transfer option in the Inventory Overview. When you select this icon you will be taken to another window as shown in the image below.
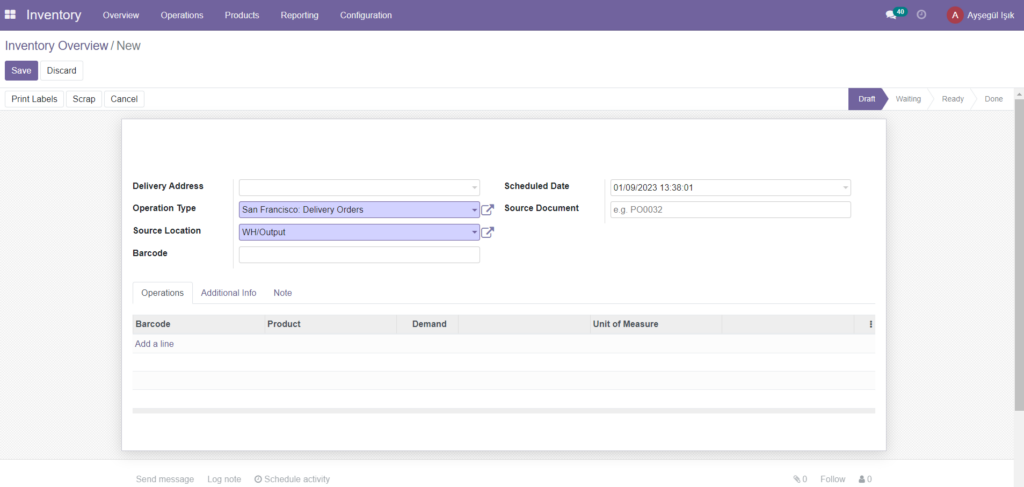
In this Scheduled transfer window, you can provide the necessary details for an instant transfer application. You can provide the Delivery Address, Reference of the Document and also assign the product. After providing all this information, you can save the details by selecting the Save button. You will now be able to view and access the Mark as To Do button. This can be used to schedule the created task to a specific date.

Inventory Arrangements
Your company’s stock management is very important while carrying out your company’s operations. For easy access to orders, you should update your stocks and keep them in certain locations. For better inventory management, you or a company official should keep records of product movements entering and leaving stock.
However, there may be situations where you need to make some adjustments according to the physical stock situation of your company. The Odoo platform makes this possible with its Inventory adjustment feature. The Inventory adjustment in the Odoo system helps to specify the correct amount of units equal to the physical stock available in the company warehouse in certain locations. Changes brought to the inventory will be recorded in the reporting section, so you can have a record of both the correction and the current stock.
Update amount
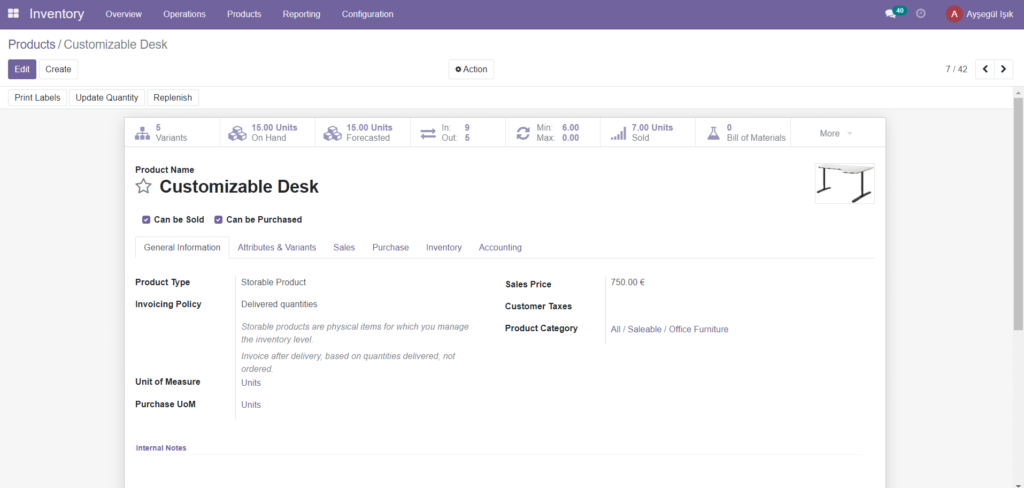
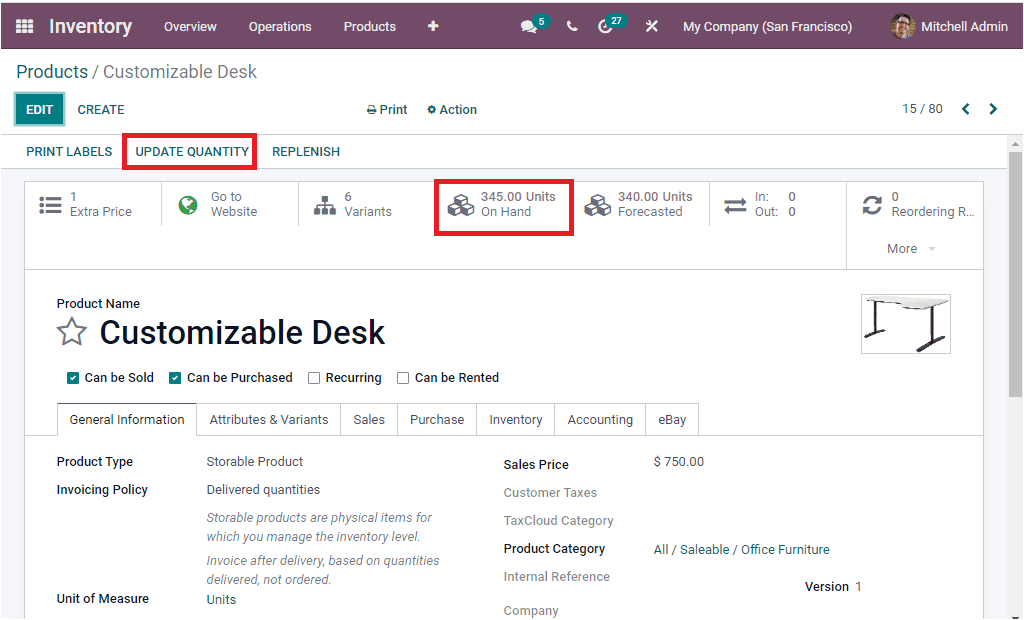
Odoo Da stock editing feature allows you to adjust the stock by updating the quantity of each product. By using this feature, you can update the number of products to ensure that the company’s records are correct with the physical stock of the product. This can be done by updating the quantity of the product. Quantity update option can be seen in each product description window. You can select the relevant product to update the product quantities. In the product description window, you can view the number of units you have by viewing the corresponding tab highlighted in the image below. To update the unit quantity, you can click the Update Quantities button in the same window.
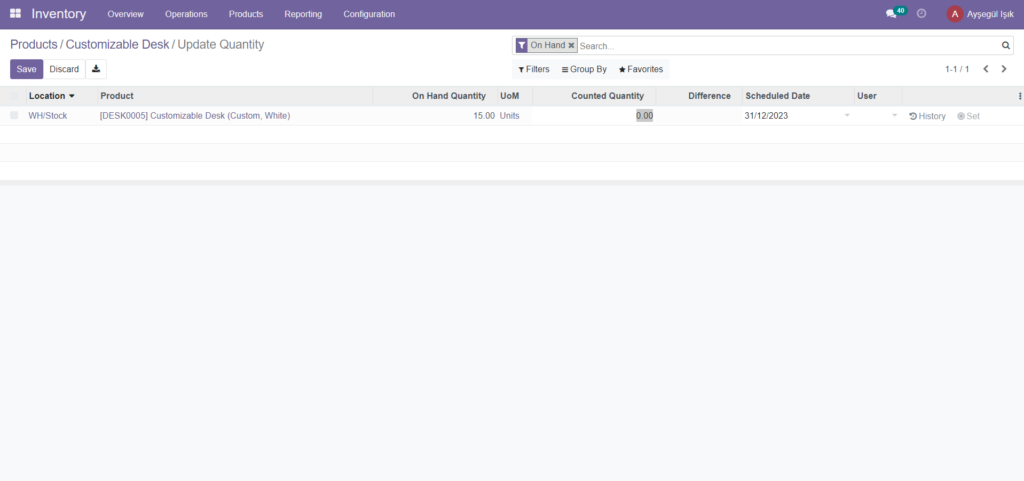
You can select the record to change the on-hand quantity and update them to the relevant warehouse. You can provide the Product Name and Quantity Counted for this. Stock Quantity, Unit of Measure, Planned Date, etc. will be allocated automatically. After providing the Counted Quantity and the Product, you can set the process by clicking the Apply button. The differences will now be displayed in the Units on Hand button in the Product window. The screenshot is shown below.

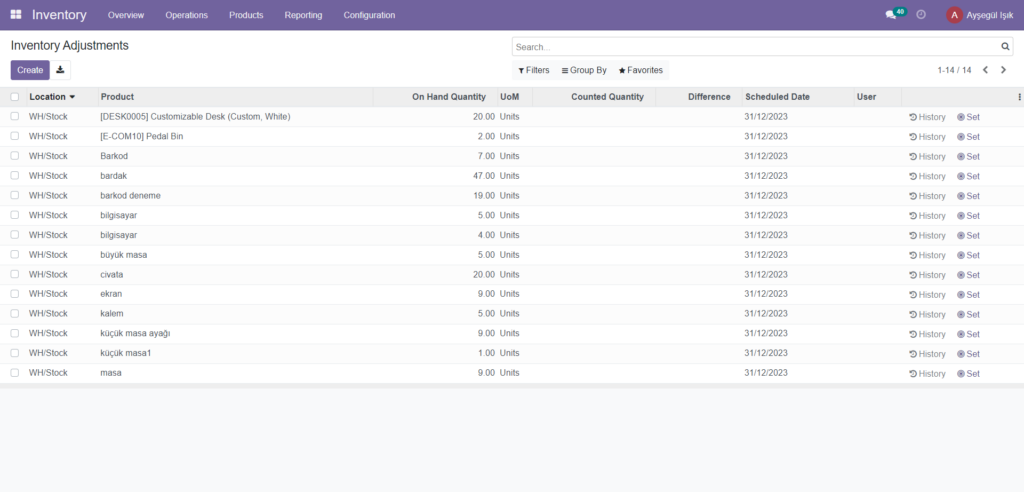
Inventory Adjustments for multiple products
The Odoo system also allows you to efficiently manage and configure inventory set-ups for multiple products based on your company’s warehouse or stock shelf. This advanced process is a special feature for updating quantities and directly adjusting changes to existing products. To perform this operation, the Inventory Adjustments menu can be accessed from the Operations tab of the Odoo Inventory module. You can easily create Inventory Adjustments using this menu. An image of the Stock Arrangements window is shown below.
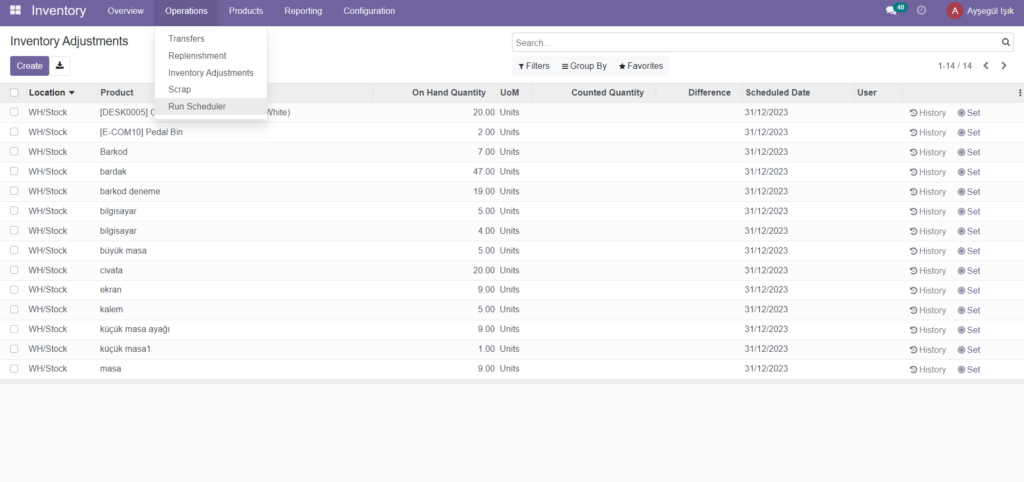
Run Scheduler
Run Scheduler in Odoo are considered computational procedures that will be very helpful in automating the company’s production and purchasing functions. This allows you to configure processes according to rules, removal methods, reorder rules, and many other processes defined in the Odoo system. Also, this option allows you to send automatic purchase offers to vendors based on the operational rules applied. You can also customize the timer option in the Odoo system to run and run according to regular time intervals set by users. The scheduling option can also be run manually. In this Inventory module you can view the Run Timers menu under the Processes tab as shown in the image below.
You can also cancel the operation by selecting the available cancel button.
Warehouse management
The most important function of the inventory management module is warehouse management. We know that the warehouse is the actual building where stocks of stock are kept securely. These warehouses can be away from the company or operate in the same building but as a separate warehouse. For these reasons, managing warehouses manually is a tedious process.
The fully automated Odoo ERP gives you an idea to easily manage all warehouse operations management with its inventory module. Highly advanced Odoo Inventory module, multi-warehouse management, inter-warehouse transfers etc. It will improve your performance of each warehouse management operation such as
If you want to access the Warehouse menu, you can select it from the Configuration tab of the Odoo Inventory module. The image of the repository window is shown below.
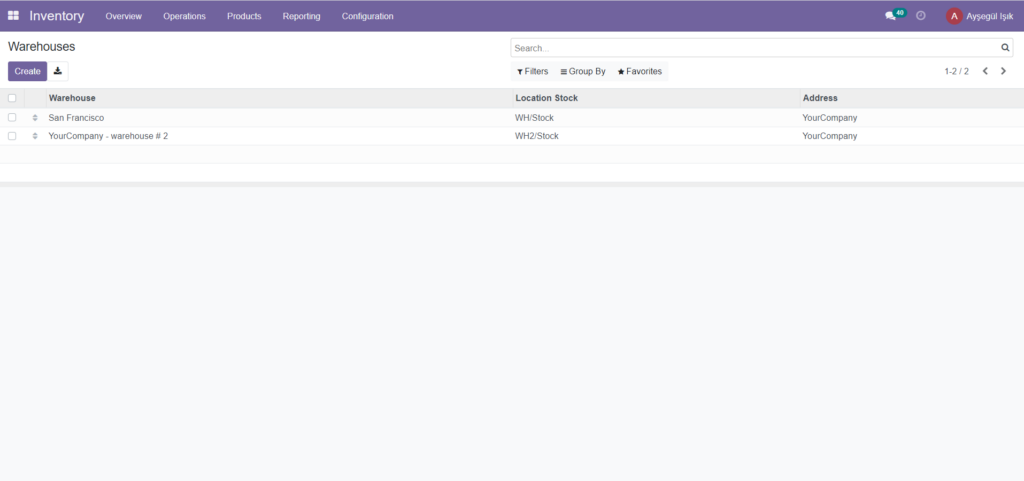
The Create icon in the window will help you create new Repositories if needed.
A screenshot of the repository creation form is shown below.
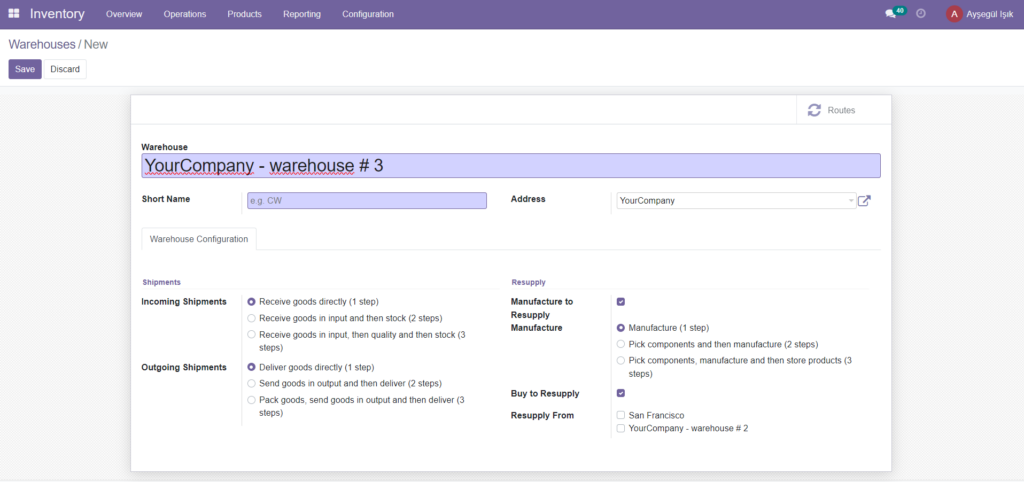
Incoming shipments can be selected as one-step, two-step and three-step.
In one step, the goods will be received directly.
Two steps means receiving goods as input and then as stock.
The three steps means that the goods go through the input, then the quality control stage, and then received as stock.
The same procedures will apply to outgoing shipments.
After selecting the Incoming and Outgoing shipments, the Supply details for the production can be defined.
So a company can have more than one warehouse. Thus, products can be re-supplied from one warehouse to another. To set up this operation, Odoo includes the Replenishment feature, which helps you share items and raw materials across warehouses.
This feature is very useful when materials are out of stock in any of your warehouses.
Here you also have a choice of one step, two steps and three steps.
Move components directly to the manufacturing location and initiate the manufacturing process in the One-Step process.
Select components in two steps and then produce.
In the three-step case, select the components, produce them, and then store the products.
To get replenishment from another warehouse, the Production for Replenishment option can be activated. The Buy for replenishment option can also be enabled to purchase raw materials or products to replenish.
Locations
Odoo Da Location attributes can be defined as real or physical locations or places within the warehouse where goods are stored. Odoo allows you to manage multiple locations in a warehouse. In addition, the system allows you to configure location operations according to warehouse operations and given descriptions.
When considered as a sub-location of a warehouse, it is actually a shelf, floor, etc. It means. That is, it is only part of the repository and cannot be linked to more than one repository. However, you have the possibility to configure multiple locations under a single repository. Odoo manages three types of locations, Physical Locations, Co-Locations, and Virtual Locationsstrong. Physical Locations are observed as an internal location that is actually part of your warehouses. Your warehouse may have a filling and unloading area (shelf, aisle, etc.). In the case of Partner Locations, it is the location in a customer’s or vendor’s warehouse. It also works like principles of Physical locations; the only difference is you are not seen as the owner of the repository. When we come to Virtual Spaces, they are virtual spaces that do not exist. However, the product can also be managed without its physical presence. It will turn out to be useful when needed. For example, if you need to remove lost items from stock (in case of loss of inventory) or you want to consider items going to your warehouse (supplies).
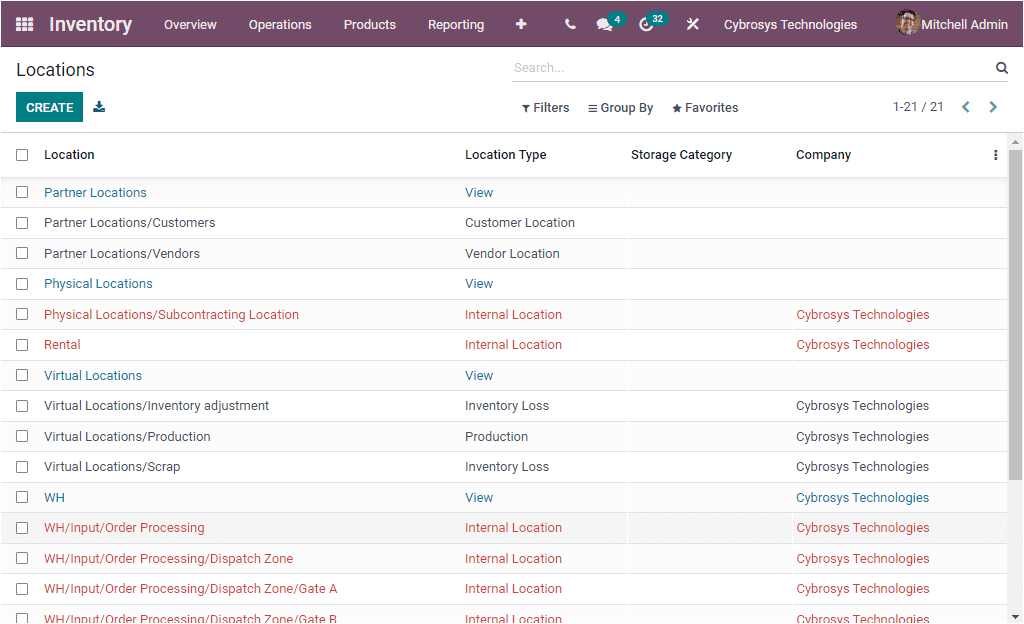
The Location menu on the Odoo platform can be accessed from the Configuration tab of the Odoo Inventory module when you enable it from the Settings page. A screenshot of the location window is shown below.
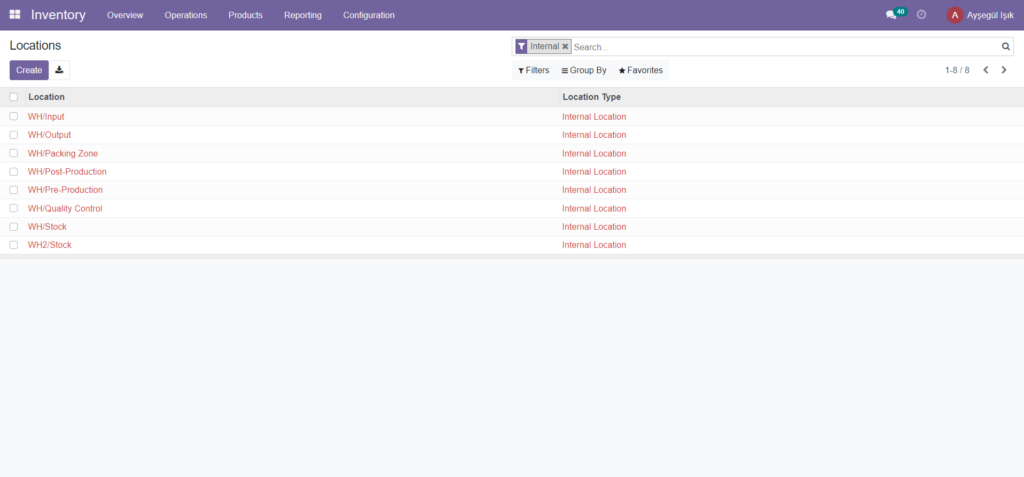
You can use the filtering option to sort your data easily.
You can use the default and customizable filtering options.
The default filters available in the window allow you to view the window by Internal Locations, Customer Locations, Production, Vendor, and Archived Locations.
You can also create customized groups using the Group By option available.
The Favorites menu includes advanced options such as Save current search, Import Records, Add list to spreadsheet, Add to my dashboard and Add to Google Spreadsheet.
You can also export all records to excel sheet by selecting the Export icon.
The Create icon can be used to configure new Locations. The image of the location creation form is shown below.
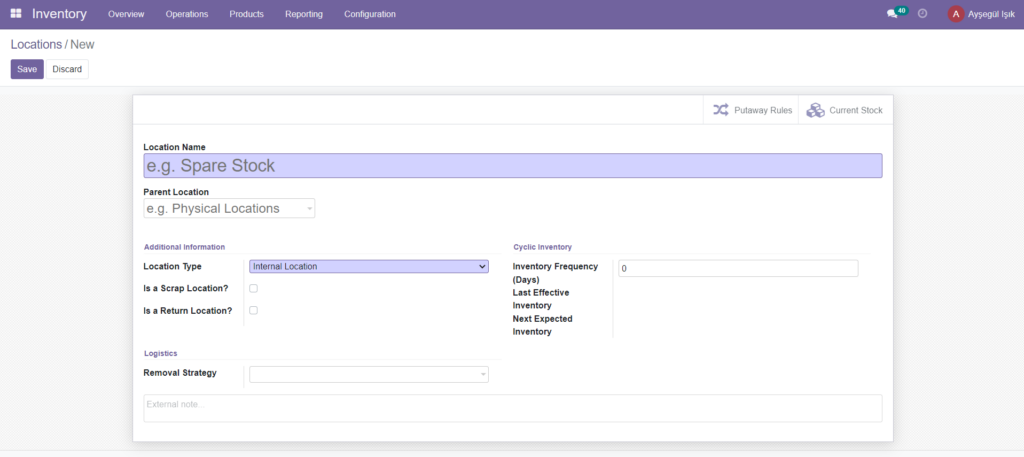
You can also allocate the Location Name along with the Home Location in the location creation form. You then need to define various additional information. Location Type, Storage Category, Company and Barcode. The Position Type can be populated using the available drop-down menu. The dropdown includes some options such as:
- Vendor Location: Vendor Location is the virtual location that represents the source location of products from its vendors.
- View: The virtual location used to create hierarchical structures for your warehouses that aggregate their direct product-free sub-locations.
- Internal Locations: Physical locations inside your own warehouses.
- Customer Location: The virtual location that represents the destination location of the products sent to your customers.
- Loss of Inventory: A virtual location that serves as a counterpart to inventory operations used to correct stock levels (physical stocks).
- Production: Virtual counterpart locations for production operations. This location consumes components and produces finished products.
- Transit Location: The equivalent location that should be used for operations between companies or between warehouses.
Later, the boxes can be activated and the location can be specified as scrap location or return location. You can also allocate Cyclic Inventory details such as Inventory Frequency, Last Active Inventory, Next Expected Inventory. Also, the Removal strategies of this particular location can be determined based on the default methods available. The default methods available in the drop-down menu are shown in the image below. This dropdown includes First In First Out (FIFO), Last In First Out (LIFO), First Expire First Out (FEFO) and Closest Locations.
Rules and Routes
Rules and Routes The movements of the product from the warehouse to the warehouse or to the warehouse are carried out according to the orders or applied strategies. These product movements in Odoo are structured according to some strictly followed and observed operation routes. It is a customizable feature that allows you to create and configure the product movements of your company inventory according to some operation routes. These rules or routes can be defined at the start of the operation, or created or added during the operation. The Odoo system helps you tightly manage these product movements defined by routes until you bring any changes.
Rules
Rules in the Odoo system can be easily defined in the Rules window, accessible from the Configuration tab of the Odoo Inventory module. You can view the Rules menu, which can be clicked and selected in the Configuration tab. An image of the Rules window is shown below.
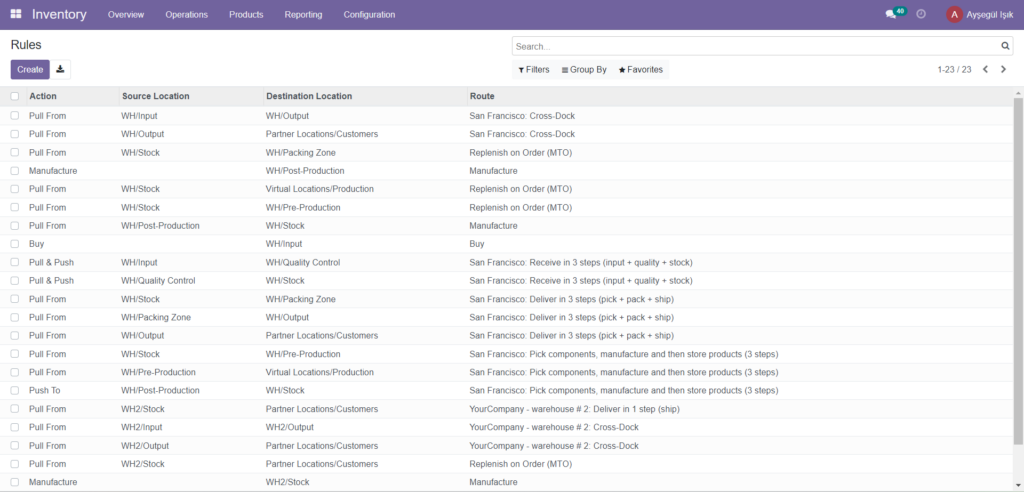
Important fields for each of these rules, such as Action, Source Location, Destination Location, Route, and Company, are displayed. Each of these rules can be selected and also make any desired changes.
The Create icon can be used to create new Rules.
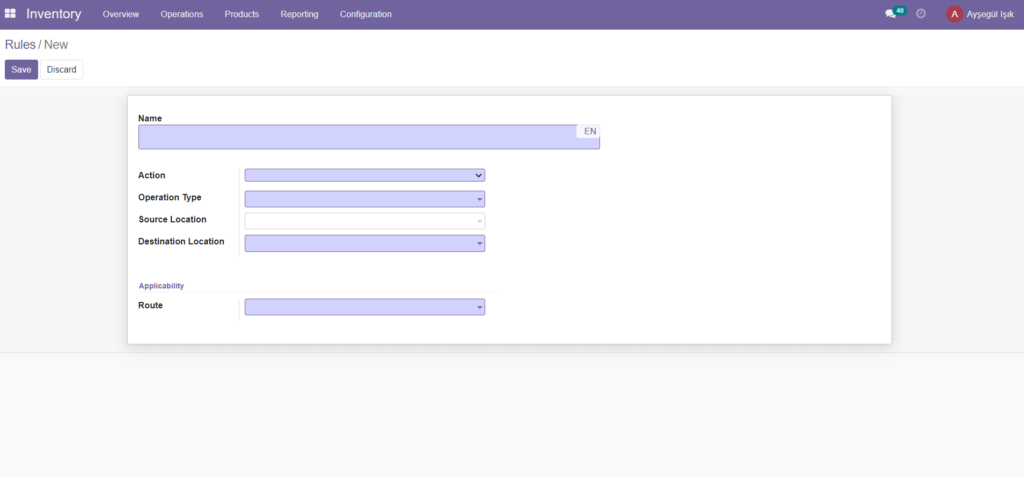
Pull rules can be used when you need a product for any location. This rule helps you pull the product from another location.
Push rule can be used when we have product arrival in inventory. We will be able to slide or push the product to certain places. In the case of manufacture As a rule, the manufacture of products may also be taken into account. When items are needed at the source location, a request for quotation is created to meet the need. The Purchase rule can be used to purchase items from vendors. The request for quotation is created when the items are needed at the destination. You can also specify Transaction Type, Source Location, Destination Location. You can also specify the relevant Route and Company associated with the operation, along with the Delivery times for this operation. . You can save all these details when you fill in.
Routes
Routes on the Odoo platform are described on each of the Product pages. You can view the options in the Inventory section of the product page as in the image below.
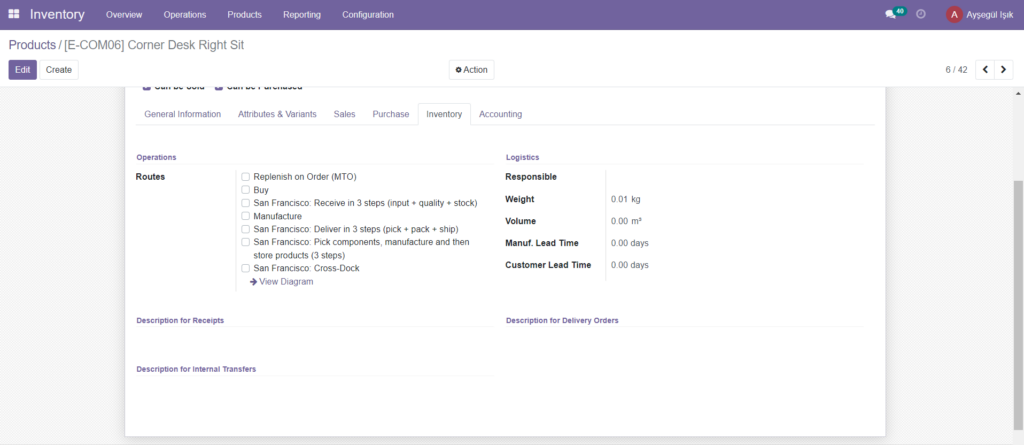
Configuring Product Routes
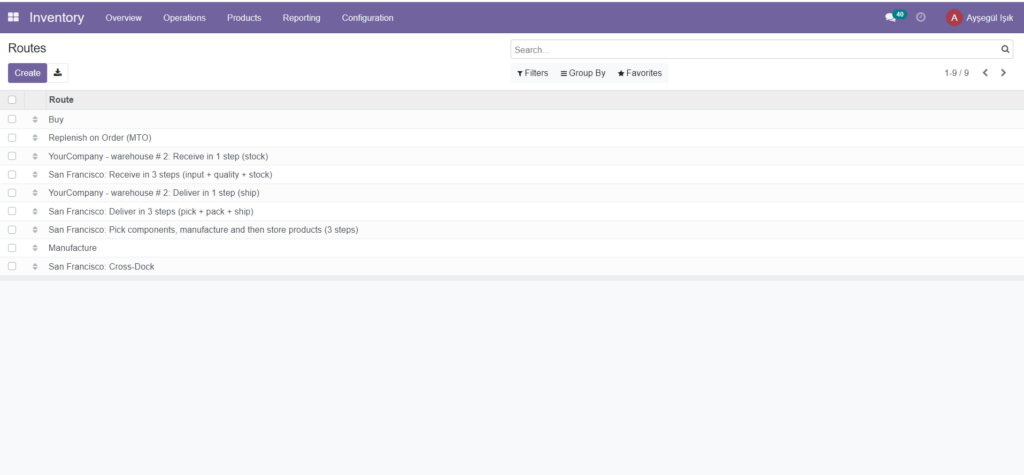
Product routes in the Odoo platform can be created and configured in the Routes menu, accessible from the Configuration tab of the Odoo Inventory module. To view the window, go to Inventory >Configuration >Routes. Below is a screenshot of the window.

